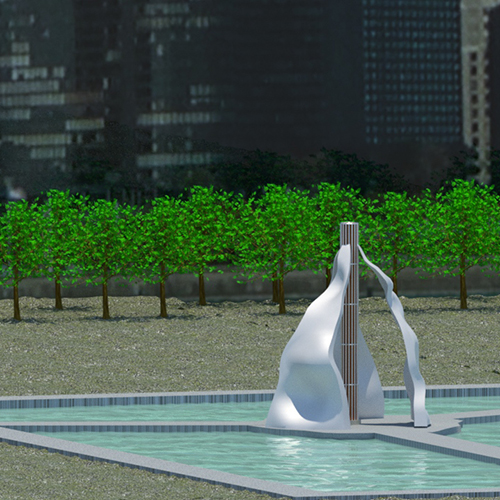
| For our final assignment we were tasked with combining the design principles we had learned to create our own pavilion inside of 3dsMax. First, we had to come up with our inspiration for the pavilion along with the setting and function. I was inspired by the basic idea of pitching a tent with one central pole, and from wavy and bubbly looking metal textures which I tried to create. I decided that my pavilion would fit best in the context of a city park positioned almost like a monument sitting on water showing its reflection. After creating the central pole and using the shell modifier to create an almost cage around it, I began to create the big metal walls seen in the final project. They started as rectangles that I then used a bend modifier to add the curve forwards as well as the taper at the top. From there I converted each of the three into an editable poly and edited each of the segments to create the wavy curves unique to each wall. After constructing this I added the surrounding pathways, landscaping, and foliage. Then it was time to find the right background photo which proved to be difficult. After finding one I like I created a large wall with a curve in it to mimic a cityscape background for rendering. From there I created the 6 renders trying to capture somewhat of a front, top side, and detail shots to show off the pavilion and how it interacts with the background. I think this project was a great culmination of everything we learned, and it was interesting to work on a longer-term design project like this. It enjoyed seeing everything come together, and it is cool to see how everyone in class interpreted the idea of a pavilion. |
 |
|


